
Ableton Live 12.4 Link Audio: 5 Ways Real-Time Collaboration Changes Everything
March 11, 2026
SoundBridge 3.0 vs Splice vs AudioMovers: Best Remote Studio Tool in 2026
March 11, 2026
Spotify lossless mastering just became the new standard. Since September 2025, every Spotify Premium subscriber can stream in 24-bit/44.1kHz FLAC at no additional cost — and that changes the game for producers and mastering engineers. The compression artifacts that once masked imperfections in your masters? Gone. Every detail now reaches the listener exactly as you intended.
In this guide, I’ll walk you through 7 essential mastering checks to ensure your music sounds its absolute best on Spotify’s lossless tier. Whether you distribute through DistroKid, TuneCore, or CD Baby, these steps apply universally.
1. Deliver 24-Bit Native Masters — Never Downsample
Spotify’s lossless tier streams at 24-bit/44.1kHz FLAC. If you’ve been bouncing your 24-bit sessions down to 16-bit before delivery, it’s time to stop. According to Spotify’s official audio format guidelines, 24-bit native masters are now the preferred delivery format. Any content submitted below 16-bit/44.1kHz won’t even qualify for lossless playback on the platform.
This is a meaningful shift. For years, 16-bit/44.1kHz (CD quality) was considered sufficient for streaming. With Spotify lossless mastering now reaching over 250 million Premium subscribers, delivering at the highest bit depth your session supports is no longer optional — it’s essential.
2. Use FLAC Format for Distribution
While WAV is technically lossless, Spotify prefers FLAC deliveries. FLAC embeds metadata more reliably, and file sizes are 40-60% smaller than WAV — reducing upload errors and processing delays at your distributor. As MasteringBOX notes, you should always submit the highest quality uncompressed or lossless file and let each platform handle its own encoding internally.
3. Export at Your Session’s Native Sample Rate
If you tracked and mixed at 44.1kHz, export at 44.1kHz. If you worked at 48kHz, keep it at 48kHz. Spotify handles all internal sample rate conversion, and pre-downsampling your master adds an unnecessary quality degradation step. Venia Mastering’s technical guide emphasizes this point: let the platform do the conversion, not your DAW’s offline bounce.
4. Target -14 LUFS Integrated Loudness — The Spotify Lossless Mastering Sweet Spot
Spotify’s loudness normalization defaults to -14 LUFS integrated. Masters louder than this get turned down; quieter ones get boosted. According to Spotify’s normalization documentation, users can also select -19 LUFS (quiet) or -11 LUFS (loud) modes.
The practical takeaway: target -14 LUFS as your baseline, with genre-appropriate adjustments within ±2 LUFS. A hip-hop track at -12 LUFS will get turned down by 2 dB, but that’s often preferable to losing the punch the genre demands. A jazz recording at -16 LUFS will get a gentle 2 dB boost — perfectly acceptable.
5. Set True Peak Ceiling to -1.0 dBTP
Even with lossless delivery, encoding and decoding processes can raise inter-sample peaks by up to 1 dB. iZotope’s streaming mastering guide recommends setting your true peak limiter to -1.0 dBTP as a standard ceiling. If your master sits significantly above -14 LUFS, push that down to -2.0 dBTP for extra safety margin.
In a lossless environment, clipping is more audible than ever. What might have been masked by OGG Vorbis compression at 320kbps will now be plainly heard by anyone with decent headphones and a wired connection.
6. Apply TPDF Dithering Only When Reducing Bit Depth
If your DAW session runs at 32-bit float and you’re exporting to 24-bit, you need TPDF (Triangular Probability Density Function) dithering as the final processing step in your signal chain. However, if your session is already at 24-bit, adding dither is unnecessary and will only raise the noise floor.
The rule is simple: dither once, at the very end, only when reducing bit depth. Never double-dither, and never dither before other processing steps.
7. Preserve Dynamic Range — The Lossless Advantage
Here’s where Spotify lossless mastering demands a genuine mindset shift. That heavily compressed master that sounded punchy and competitive in 320kbps OGG? In 24-bit FLAC, listeners will hear the pumping, the distortion artifacts, and the crushed transients that lossy compression once smoothed over.
With Apple Music offering lossless since 2021 (up to 24-bit/192kHz), Tidal and Amazon Music in the game, and now Spotify’s ~250 million Premium subscribers joining the lossless era, dynamic range is your competitive edge. Masters that breathe will stand out against the hyper-compressed competition.
Quick Reference: Your Spotify Lossless Mastering Checklist
- Deliver 24-bit native masters (no 16-bit downsampling)
- Use FLAC format for distribution
- Export at session native sample rate (44.1kHz or 48kHz)
- Target -14 LUFS integrated loudness
- True peak ceiling at -1.0 dBTP (-2.0 dBTP for loud masters)
- TPDF dithering only when reducing bit depth, as the final step
- Preserve dynamic range — over-compression is now audible
One final reminder: Bluetooth still compresses the audio signal regardless of source quality. For true lossless playback, your listeners need a wired DAC or wired headphones. As a producer, you can’t control that — but you can control what you deliver. Make every bit count.
5. Monitor Peak-to-RMS Ratio for Lossless Transparency
In the lossless streaming era, your peak-to-RMS ratio becomes critically important. A healthy ratio between 8-12 dB indicates sufficient dynamic range that translates beautifully to FLAC playback. Masters with ratios below 6 dB often sound fatiguing on high-resolution systems, while ratios above 15 dB might lack competitive loudness on mobile devices.
Use your DAW’s built-in metering or dedicated plugins like FabFilter Pro-L 2 or iZotope Insight 2 to monitor this ratio during your mastering session. Electronic genres typically sit around 8-10 dB, while acoustic music can comfortably reach 12-14 dB. The key is maintaining this ratio consistently across your entire master, avoiding sections where heavy limiting crushes the dynamics unexpectedly.
6. Check Stereo Imaging with Mid-Side Analysis
Lossless playback reveals stereo imaging issues that MP3 compression once masked. Poor phase correlation between left and right channels becomes immediately apparent on quality headphones and monitors. Run your master through a mid-side analyzer and watch for these critical indicators:
- Correlation meter should stay above +0.7 for mono compatibility
- Side channel shouldn’t exceed mid channel level by more than 6 dB
- Bass frequencies below 120 Hz should remain primarily in the mid channel
- Check for excessive stereo width that creates phase cancellation
Tools like Waves S1 Stereo Imager or Ozone’s Imager provide real-time visualization of your stereo field. Pay particular attention to vocal sections and lead instruments — these elements need to translate clearly across all playback systems, from AirPods to high-end studio monitors.
7. Test Against Reference Tracks in Lossless Format
Your reference tracks need upgrading too. Comparing your 24-bit master against 320 kbps MP3 references no longer provides accurate context. Build a reference library of commercially released tracks in FLAC or high-resolution formats. Focus on recent releases from 2024-2025 that were specifically mastered for lossless streaming.
Match levels using a plugin like Reference or MasterCheck Pro, ensuring your comparisons happen at identical loudness levels. This reveals tonal balance differences, dynamic range characteristics, and stereo imaging choices that work effectively in the lossless domain. Spend extra time A/B testing in the 2-5 kHz range where streaming artifacts traditionally occurred — your master should now compete directly with the reference without any quality compromises.
Essential Monitoring Setup for Lossless Mastering
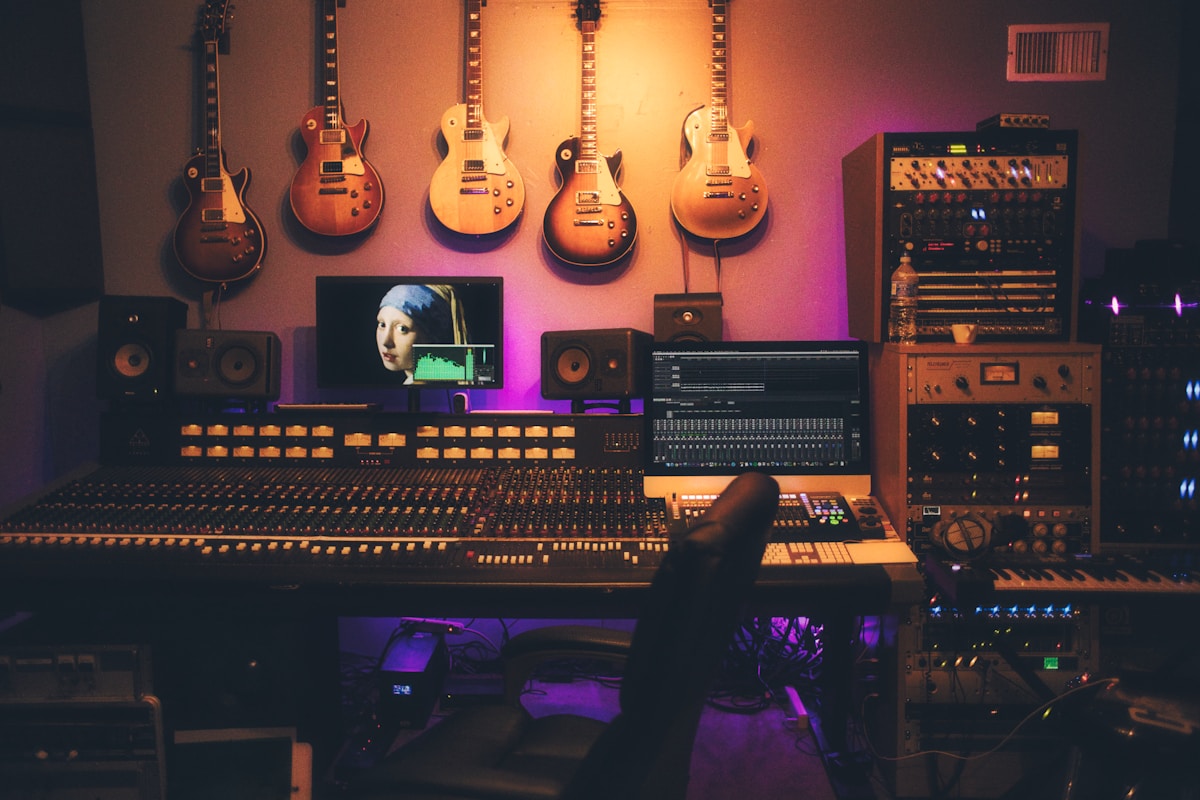
Your monitoring chain determines how accurately you can evaluate these lossless masters. The bare minimum setup requires studio monitors capable of reproducing 20 Hz to 20 kHz with less than ±3 dB deviation. Popular choices include Yamaha HS8, KRK Rokit 8 G4, or Adam Audio T7V for home studios, while professional facilities often use Focal Twin6 Be or Genelec 8351A.
Audio Interface Requirements
Your audio interface must support 24-bit/192 kHz playback, even if you’re working at lower sample rates. Interfaces like the Focusrite Scarlett 2i2 4th Gen, PreSonus Studio 24c, or RME Babyface Pro FS provide sufficient quality for lossless mastering work. The key specification is THD+N (Total Harmonic Distortion + Noise) below -110 dB, ensuring your monitoring path doesn’t add artifacts to your evaluation process.
Room Acoustic Considerations
Lossless mastering reveals room acoustic problems more clearly than compressed audio ever did. Untreated rooms with flutter echoes, standing waves, or excessive reverberation will mislead your mastering decisions. Basic treatment includes absorption panels at first reflection points, bass trapping in corners, and maintaining 60% absorption coefficient across the 250 Hz to 4 kHz range.
If professional acoustic treatment isn’t possible, invest in high-quality reference headphones like Sennheiser HD 650, Audio-Technica ATH-M70x, or Sony MDR-7506. These provide consistent frequency response that translates well to various playback systems, giving you a reliable secondary reference for your lossless masters.
5. Monitor True Peak Levels: Stay Below -1 dBTP
Spotify’s lossless streaming introduces a critical consideration many producers overlook: intersample peaks. When your 24-bit master gets converted to different sample rates across various playback devices, mathematical interpolation can create peaks that exceed your original 0 dBFS ceiling. This phenomenon, called intersample peaking, can cause digital clipping even if your original master shows no overs.
Use a true peak limiter and keep your masters below -1 dBTP (decibels True Peak). Professional mastering engineers like Bob Power and Emily Lazar have adopted -1.5 dBTP as their standard ceiling for streaming releases. This headroom prevents distortion when Spotify’s servers perform sample rate conversion for different devices and connection speeds.
Most modern limiters include true peak metering. Pro-L 2, Ozone, and even free options like LoudMax display both peak and true peak readings. The difference matters more in lossless streaming because listeners can actually hear the artifacts that lossy compression previously masked.
6. A/B Test Against Reference Tracks in Lossless
Your reference workflow needs an update for the lossless era. Comparing your master against commercially released tracks through Spotify’s 320kbps Ogg Vorbis compression no longer represents what Premium subscribers actually hear. The dynamic range, stereo imaging, and frequency response differences between lossy and lossless playback can shift your mixing decisions significantly.
Set up a dedicated reference chain using Spotify’s desktop app with lossless enabled. Create a playlist of 3-5 recent releases in your genre, then A/B your master directly against these tracks at matched levels. Pay special attention to:
- Bass extension and sub-frequency content
- High-frequency detail and air
- Stereo width and imaging precision
- Transient definition and micro-dynamics
These elements become significantly more apparent in lossless playback. What sounded competitive through lossy compression might reveal weaknesses when streamed in full fidelity.
7. Validate Mono Compatibility for Algorithm Optimization
Spotify’s recommendation algorithm analyzes audio content using machine learning models that often process mono-summed versions of tracks for feature extraction. Poor mono compatibility can negatively impact how their system categorizes your music, potentially affecting playlist placement and discovery.
Check your master’s mono compatibility using your DAW’s built-in mono button or a dedicated plugin. Listen for:
- Phase cancellation in bass frequencies
- Vocal or lead element level drops
- Overall tonal balance shifts
Critical elements like vocals, bass, and kick drums should remain present and punchy in mono. If you hear significant changes, revisit your mix’s stereo processing, particularly choruses, delays, and stereo imaging plugins on key elements.
The Technical Reality of Spotify Lossless Distribution
Understanding Spotify’s backend processing helps optimize your masters for their system. When you upload through distributors, Spotify creates multiple encoding versions: the original lossless file for Premium subscribers, plus various lossy formats for different connection speeds and device capabilities.
This multi-format approach means your master serves as the source for all subsequent encodings. A poorly optimized lossless master creates problems that cascade through every playback format. Conversely, a properly prepared 24-bit master ensures optimal quality across all tiers of Spotify’s service.
The processing chain typically involves normalization first, then encoding to various formats. This is why hitting your target LUFS integrated level and maintaining proper peak levels matters more now than ever. Any clipping or distortion in your source master gets encoded into every version Spotify generates.
Quality Control Across Device Types
Test your masters on various playback systems that support Spotify lossless: high-end headphones, car audio systems with Spotify Connect, and home speakers via Spotify’s desktop app. The increased dynamic range and frequency response of lossless streaming can reveal problems that weren’t apparent during traditional mastering workflows.
Consumer playback has evolved significantly since Spotify introduced lossless. Apple’s push toward higher-quality audio, improvements in Bluetooth codec support, and the proliferation of quality DACs in consumer devices means your masters now reach listeners through much more revealing playback chains than previous generations of streaming audio.
Get weekly AI, music, and tech trends delivered to your inbox.


