
GPT-5.4 vs Claude Opus 4: Head-to-Head Benchmark for Content Creators — Speed, Quality, and Cost
March 12, 2026
Best DAW for Music Production 2026: Ableton vs Logic Pro vs Cubase Complete Guide
March 12, 2026
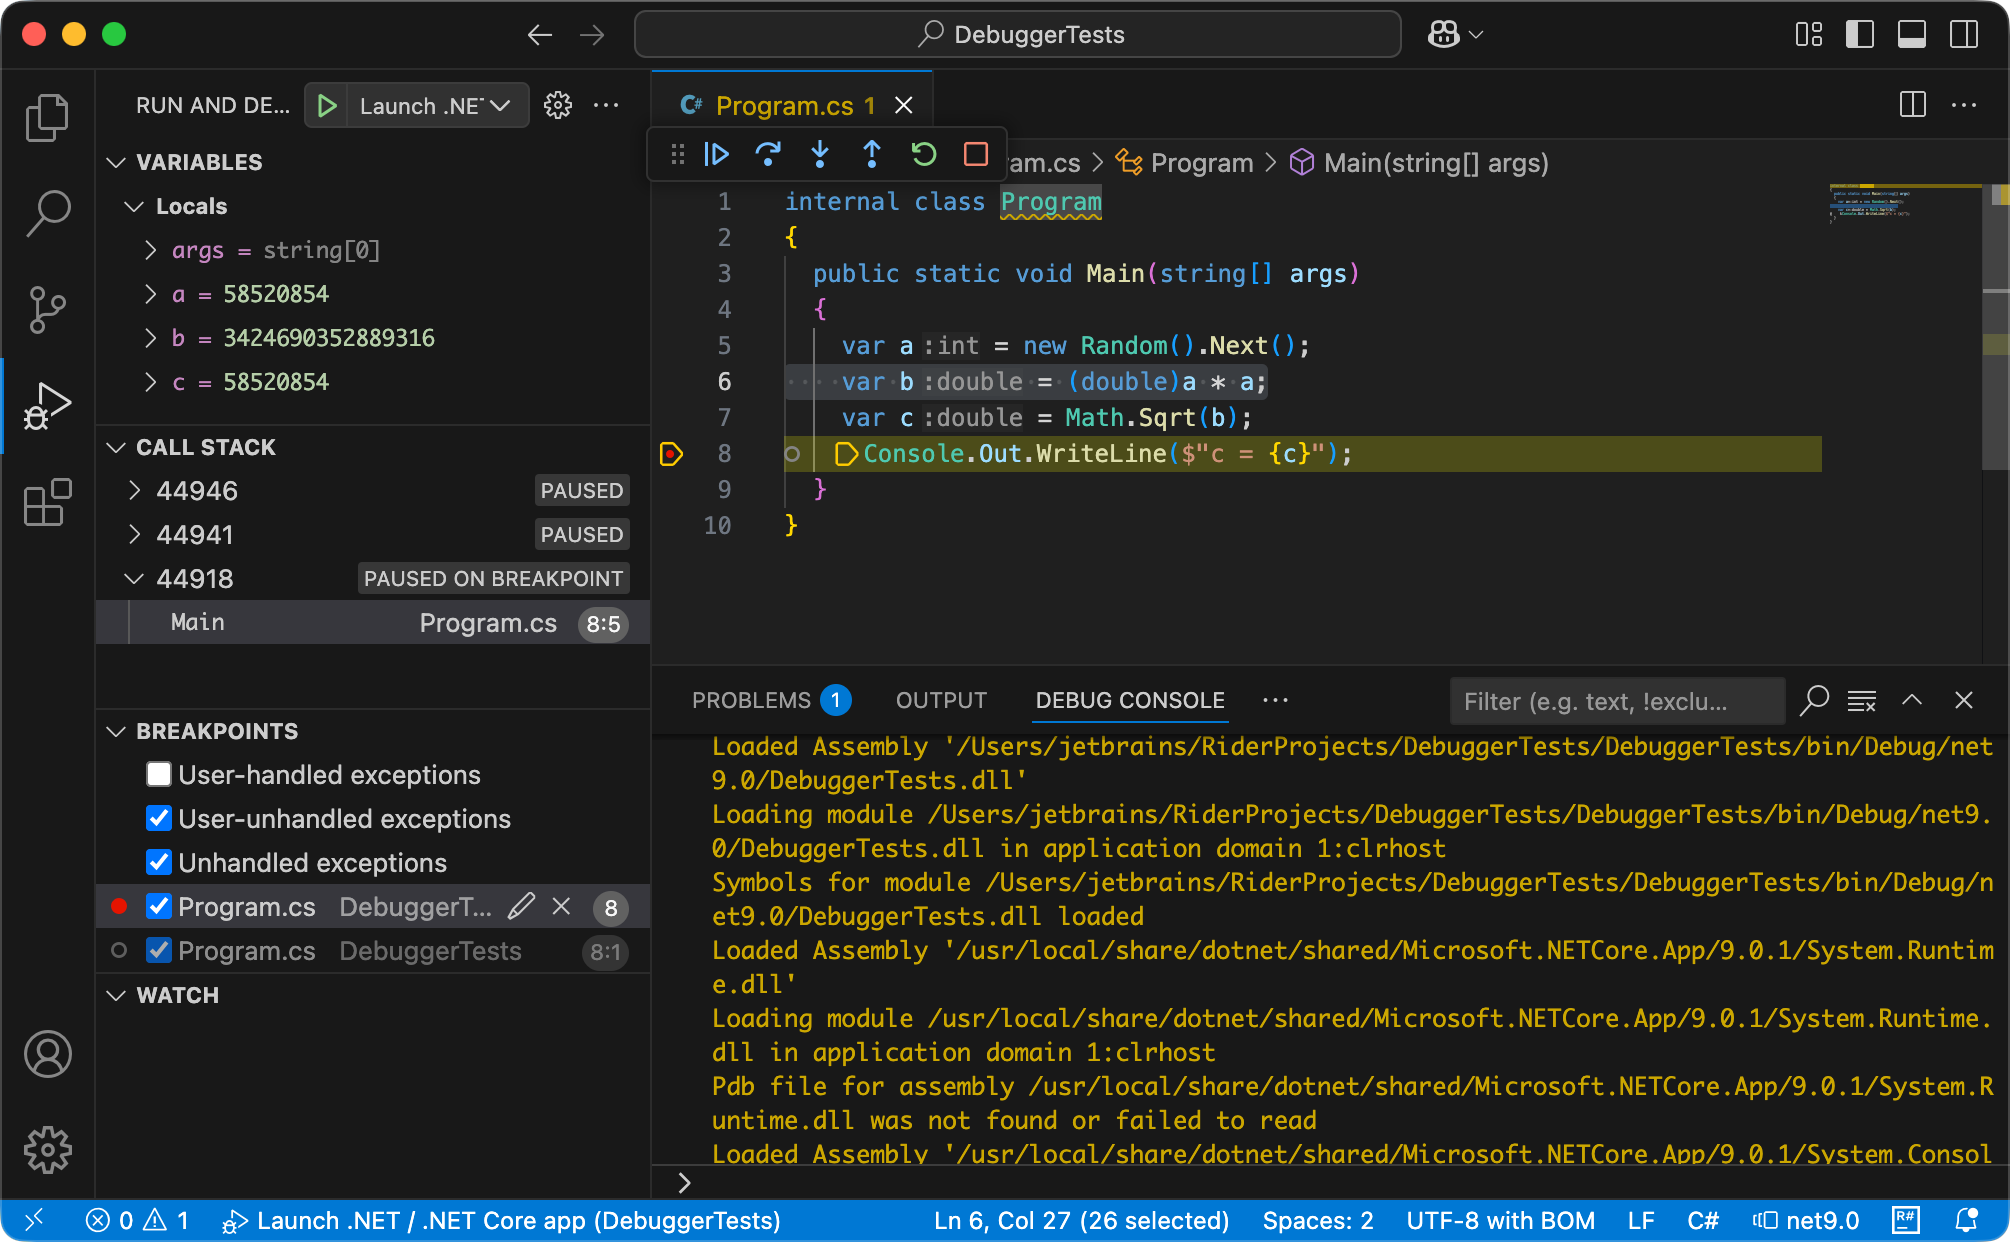
It’s finally out. After a year in preview, ReSharper just landed in VS Code — and it’s free for non-commercial use. If you’ve been clinging to Visual Studio because you couldn’t live without ReSharper’s inspections and refactorings, that excuse is officially gone. This guide walks you through everything you need to set up a productive C# workflow in VS Code using the new ReSharper extension in your first week.
What ReSharper for VS Code Actually Gives You
JetBrains spent a year in public preview sharpening this extension, and it shows. The ReSharper VS Code extension brings real-time code inspections and quick-fixes for C#, Razor, Blazor, and XAML — the same quality you’d expect from the Visual Studio plugin. Here’s what’s in the box:
- Code Inspections & Quick-Fixes: Real-time analysis highlights issues as you type, with one-click fixes for common problems.
- Advanced Refactoring: Reliable symbol renaming across your entire solution, extract method, introduce variable, and more.
- Smart Code Completion: Context-aware suggestions with automatic namespace imports — no more manual
usingstatements. - Solution Explorer: Manage files, folders, NuGet packages, and projects directly inside VS Code.
- Unit Test Runner: Run NUnit, xUnit.net, and MSTest tests without leaving the editor.
- Navigation: Jump to symbols, usages, and even decompiled external sources.
- Live Templates: Code snippets and inline documentation at your fingertips.
Debugging support is the one notable gap — it’s listed as the top roadmap item and should arrive soon.

Supported Editors and How to Install
The extension works beyond just VS Code. It’s compatible with any editor that supports VS Code extensions:
- Visual Studio Code
- Cursor
- Windsurf
- VSCodium
Installation takes about 30 seconds. Two options:
Option 1: Extensions View
Open the Extensions panel (Ctrl+Shift+X), search for ReSharper, and click Install. Make sure you’re installing the official JetBrains extension.
Option 2: Command Palette
ext install JetBrains.resharper-codeAfter installation, open your project. ReSharper automatically detects .sln, .slnx, .slnf, or .csproj files. If you have a single solution, it loads automatically. Multiple solutions? You’ll be prompted to pick one.
Licensing: What’s Free, What Costs Money
This is where it gets interesting. ReSharper for VS Code is free for non-commercial use. That covers:
- Learning and self-education
- Hobby development projects
- Open-source contributions (without commercial benefit)
- Content creation activities
For commercial work, you need a paid license. Options include an individual ReSharper license, the dotUltimate bundle (which includes all JetBrains .NET tools), or the All Products Pack. If you’re already on a JetBrains subscription, you’re covered.
First-Week Setup Checklist
Here’s a practical checklist to get fully productive in your first week with the ReSharper VS Code extension:
- Day 1: Install the extension, open your main solution, verify inspections are running (look for the ReSharper status in the bottom bar).
- Day 2: Explore quick-fixes. Press
Alt+Enter(the classic ReSharper shortcut) on any highlighted issue. - Day 3: Configure your test runner. Open the Testing panel and verify your NUnit/xUnit/MSTest tests are discovered.
- Day 4: Learn the navigation shortcuts —
Ctrl+Tfor Go to Symbol is a workflow changer. - Day 5: Set up live templates for your most common code patterns.
- Week 2: Report any issues you find via JetBrains YouTrack to help shape the roadmap.
The one thing missing right now is debugging, so keep Visual Studio around (or use the built-in VS Code debugger with the C# Dev Kit) for debug sessions until JetBrains ships that feature.
Is This the Visual Studio Replacement You’ve Been Waiting For?
Not quite yet — debugging is a hard blocker for many workflows. But for day-to-day C# development (writing, refactoring, testing, reviewing), the ReSharper VS Code extension is already remarkably capable. Combined with VS Code’s lighter footprint and better performance on large repos, this is a compelling setup. The gap between VS Code and Visual Studio for C# work just got significantly smaller.
Watch the JetBrains roadmap closely. Debugging support is the next major milestone, and once it lands, the migration path from Visual Studio becomes very straightforward.
💬 Need help setting up your C# development environment or want to build automated development workflows? If you need technical consulting or want to build automated development workflows, let’s talk.
Performance Impact and System Requirements
Let’s address the elephant in the room: ReSharper’s reputation for memory consumption. The VS Code extension is noticeably lighter than its Visual Studio counterpart, but it’s still more resource-intensive than the default C# extension. Here’s what you can expect:
Memory Usage
In my testing with a medium-sized ASP.NET Core project (around 50 source files), ReSharper for VS Code typically uses 200-400MB of RAM after initial indexing. Compare that to the Microsoft C# extension which sits around 100-150MB for the same project. The trade-off is worth it for the advanced inspections and refactoring capabilities, but factor this into your system planning.
For larger solutions with 100+ projects, expect 600MB-1GB of memory usage. JetBrains has optimized the indexing process significantly since the preview builds, but complex solutions with heavy dependency chains will still require patience during initial load.
CPU and Storage
Initial project indexing is CPU-intensive but typically completes within 2-3 minutes for most projects. The extension creates a cache directory that can grow to several hundred megabytes for large solutions. You’ll find this cache in your system’s temp directory under a JetBrains folder.
Minimum system requirements are 8GB RAM and any modern multi-core processor, but 16GB RAM provides a much smoother experience when working with multiple projects simultaneously. SSD storage isn’t required but significantly improves indexing performance.
Essential Configuration for Day One Productivity
Out of the box, ReSharper for VS Code works well, but a few configuration tweaks will dramatically improve your experience. These settings have saved me hours of friction during my first week with the extension.
Code Style Settings
Navigate to VS Code’s settings and search for “ReSharper”. The most impactful settings to configure immediately are code formatting preferences. If you’re working on a team with existing EditorConfig files, ReSharper respects those automatically. For new projects, set up your preferred brace style, indentation, and naming conventions in the ReSharper settings panel.
I recommend enabling “Format code on save” and “Organize usings on save” to maintain consistent code quality without manual intervention. These options appear under the ReSharper section in VS Code settings.
Inspection Severity Levels
ReSharper’s default inspection settings can be overwhelming for some codebases. You’ll likely want to adjust severity levels for specific inspections based on your project’s maturity and coding standards. Access this through the Command Palette by typing “ReSharper: Configure Inspections”.
- Errors: Keep these at maximum severity – they catch real bugs
- Warnings: Review and adjust based on your team’s standards
- Suggestions: Consider downgrading to hints for less critical style issues
- Hints: Perfect for learning opportunities without cluttering the Problems panel
Keyboard Shortcuts Worth Memorizing
ReSharper adds dozens of new commands to VS Code. These five shortcuts will immediately boost your productivity:
- Alt+Enter: Show available quick-fixes and context actions
- Ctrl+R, Ctrl+R: Rename symbol across entire solution
- Ctrl+Shift+R: Refactor this (context-sensitive refactoring menu)
- F12: Go to declaration (enhanced with decompilation support)
- Shift+F12: Find all references with advanced filtering
Workflow Integration: Making ReSharper Work with Your Existing Tools
The biggest challenge isn’t learning ReSharper’s features — it’s integrating them smoothly into your existing development workflow. After years of using various C# development setups, here’s how to make the transition seamless.
Git Integration and Code Reviews
ReSharper’s automatic code cleanup can create noisy Git diffs if not configured properly. Before your first commit, establish team agreements about formatting and organize usings. Use ReSharper’s “Cleanup Code” feature strategically — either clean up entire files or avoid it altogether during small bug fixes to prevent mixing functional and stylistic changes.
For pull requests, ReSharper’s inspection results can guide code review discussions. The extension highlights potential issues that might slip past human reviewers, particularly around null reference possibilities and unused code paths.
CI/CD Pipeline Considerations
While ReSharper for VS Code is primarily a development tool, its inspection findings should align with your build pipeline. If you’re using static analysis tools like SonarQube or CodeQL in CI, review ReSharper’s inspection settings to minimize conflicts. Consistent rule sets prevent the frustrating cycle of fixing ReSharper suggestions only to encounter different CI failures.
Consider documenting team agreements about which ReSharper suggestions require fixes versus which are optional improvements. This prevents endless refactoring cycles during feature development.
Working with Large Codebases
Enterprise codebases present unique challenges for ReSharper adoption. Start by enabling ReSharper only for specific projects within large solutions using solution filters (.slnf files). This reduces memory usage and indexing time while you evaluate the extension’s impact on your workflow.
For legacy codebases with thousands of inspection violations, use ReSharper’s “Solution-wide analysis” feature selectively. Focus on new code areas first, then gradually address technical debt in older modules. The “Inspect Code” command can generate reports for tracking cleanup progress over time.
Troubleshooting Common First-Week Issues
Every tool has rough edges, and ReSharper for VS Code is no exception. These issues cropped up consistently during my first week, along with their solutions.
Extension Conflicts
The most common issue is conflicts with existing C# extensions. If you have multiple C# language services running simultaneously, you’ll experience duplicated suggestions, competing intellisense, and potential performance problems. Disable the Microsoft C# extension temporarily to test ReSharper in isolation, then gradually re-enable other extensions to identify conflicts.
Popular extensions like “C# Extensions” and “Auto-Using for C#” often duplicate ReSharper functionality. Review your extension list and disable redundant tools to prevent interference.
Indexing Problems
If ReSharper seems stuck during project indexing, check the Output panel for error messages. Common causes include missing SDK versions, corrupted NuGet packages, or permission issues with cache directories. The “ReSharper: Restart Language Service” command from the Command Palette resolves most indexing hangs.
For projects that refuse to load, verify that your .NET SDK version matches your project’s target framework. ReSharper requires the appropriate SDK to analyze project dependencies correctly.
Performance Tuning
If VS Code becomes sluggish after installing ReSharper, start by excluding unnecessary directories from analysis. Add build output folders, node_modules, and other non-source directories to VS Code’s files.exclude setting. This reduces the analysis surface area and improves responsiveness.
Consider adjusting ReSharper’s analysis scope in the settings. “File” scope analyzes only the current file, “Project” scope covers the entire project, and “Solution” scope provides comprehensive analysis but requires more resources. Match the scope to your immediate needs and system capabilities.
Get weekly AI, music, and tech trends delivered to your inbox.

