
MLOps Best Practices 2025: MLflow 3.0, W&B Weave, and the 5 Strategies Behind 87% Enterprise AI Adoption
October 24, 2025
MLOps Best Practices 2025: MLflow vs Kubeflow vs Vertex AI — October State of the Art
October 24, 2025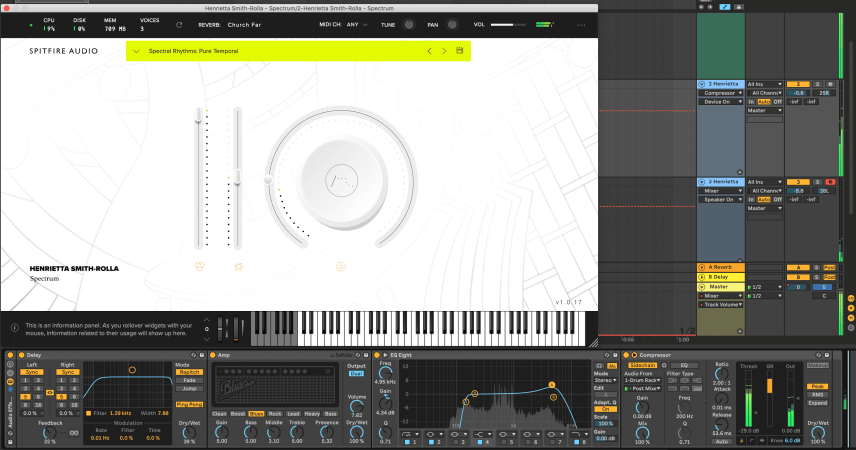
Two chords, a kick drum, and a hi-hat walk into a delay unit — and somehow an entire universe of sound walks out. That’s dub techno in a sentence. After 28 years of working with audio, I still find it remarkable that a genre built on so few elements can produce such immense depth. The secret isn’t what you play — it’s what you do to it after you press record. Let me show you exactly how dub techno delay reverb processing transforms bare-bones loops into something that sounds like it’s breathing.
Dub Techno Delay Reverb Roots: From Kingston to Berlin
You can’t understand dub techno without understanding dub reggae. In the 1970s, Jamaican engineers like King Tubby and Lee “Scratch” Perry turned mixing consoles into instruments. They’d strip a reggae track down to its skeleton, then drench it in spring reverb and tape delay, creating something ghostly and hypnotic. Fast forward to Berlin, 1993. Moritz von Oswald and Mark Ernestus — performing as Basic Channel — took that exact philosophy and applied it to minimal techno. Records like Phylyps Trak and Quadrant Dub proved you could build an entire track from almost nothing, as long as your delay and reverb processing was absolutely dialed in.
The genius of Basic Channel was restraint. Where most electronic producers in the early ’90s were adding more layers, more melodies, more complexity, they went the opposite direction. A single chord stab. One kick pattern. Sparse hi-hats. Then they ran everything through chains of delays and reverbs until the effects themselves became the composition. That approach defined an entire genre — and it’s still the blueprint today.
The Core Philosophy: Less Source, More Processing
Here’s the fundamental concept that separates dub techno from every other electronic genre: your dry source material should be almost embarrassingly simple. If your chord progression sounds interesting before processing, it’s probably too complex. You need minimal raw input because the delay and reverb processing will generate all the harmonic complexity, movement, and texture you need.
Your typical dub techno arrangement consists of four elements at most:
- Kick drum — deep, slightly boomy, 120-145 BPM range
- Hi-hats — sparse, sometimes just offbeat 8ths
- Chord stab — minor voicing, usually just 2 notes
- Bass — often just the sub from the kick itself
That’s it. Everything else comes from your effect chains. As Pheek (Montréal-based dub techno artist) puts it, reverb accounts for roughly 50% of the work in a dub techno track. I’d argue delay handles another 35%, leaving your actual sound sources responsible for maybe 15% of the final result.
The Effect Chain: Order Matters More Than You Think
Before we dive into specific settings, let’s talk signal flow. In dub techno production, the order of your effects isn’t just a preference — it fundamentally changes the character of your sound. Here’s the chain I recommend after years of experimentation:
Step 1: Saturation First
Always saturate before your delays and reverbs. Saturation adds harmonics to your source material, giving the delay and reverb engines more frequency content to work with. A clean sine wave through a delay sounds thin. That same sine wave with subtle tape saturation through a delay sounds alive. Use soft clipping or tape emulation — nothing aggressive. You want warmth, not distortion.
Step 2: Delay Second
Delay comes before reverb in the chain. Why? Because you want the reverb to wash over both the dry signal AND the delay tails, creating a unified space. If you reverse the order (reverb → delay), your reverb tails get rhythmically repeated, which sounds mechanical and unnatural. Delay into reverb creates that classic dub techno “smear” where individual repeats dissolve into atmospheric texture.
Step 3: Reverb Last
The reverb sits at the end of the chain, catching everything — your saturated source, your delay tails, and the interactions between them. This is where the magic happens. More on specific reverb techniques below.
Dub Techno Delay Reverb Techniques: The Delay Deep Dive
Delay is the engine that transforms a static chord into something that moves and evolves. Here are the key techniques:
1/8 Dotted Timing
The classic dub techno delay timing is 1/8 dotted (also called dotted eighth note). This creates a syncopated rhythm that plays against the straight beat, generating that characteristic “rolling” feel. At 130 BPM, a dotted eighth is approximately 346ms. Start there and fine-tune by ear.
Ping-Pong Stereo Spread
Use ping-pong delay to bounce repeats between left and right channels. Set the wet/dry mix to 100% wet on a dedicated send/return channel. This keeps your dry signal centered while the delay tails create width. Slightly detune the left and right delays (±3% pitch variation) for additional stereo depth — this is a classic Studio Brootle technique that Basic Channel used extensively.
Self-Feeding Feedback Loops
This is where things get dangerous — and exciting. Set your delay feedback to around 70-85%. The repeats will sustain for a long time, with each one slightly decaying. Push it higher (90%+) and the delay starts self-oscillating, building on itself until it creates new tonal content that wasn’t in the original signal. This is the heart of dub techno sound design. You’re literally letting the machine compose for you.
Pro tip: automate the feedback parameter. Keep it at 60% during verses, push it to 85% during builds, and briefly spike it to 95% at transitions. Then pull it back down and let the tail naturally decay into the next section.
Filter Delay Chains
Put a bandpass filter in the delay feedback path. As noted in Attack Magazine’s Basic Channel breakdown, setting a bandpass filter to around 450Hz with LFO modulation on the cutoff creates delay tails that shift in tonal character with each repeat. The first repeat is bright, the second is darker, the third emphasizes mids — each repetition is unique. In Ableton Live, use the Filter Delay device for this, or chain an Auto Filter before a standard delay.
Reverb: Where 50% of the Magic Lives
If delay creates rhythm and movement, reverb creates space and atmosphere. In dub techno, reverb isn’t a subtle effect you add for realism — it IS the sound.
Plate + Hall: The Dual Reverb Setup
Use two reverbs simultaneously. A plate reverb (short to medium decay, 1.5-3 seconds) adds density and presence. A hall reverb (long decay, 5-12 seconds) creates the vast sense of space. Run your chord stabs through the plate first, then into the hall. The plate thickens the sound while the hall places it in an enormous imaginary room.
Process Your Reverb
Here’s a technique most tutorials skip: don’t just use reverb — process it. Put effects on the reverb return channel itself. Filter the reverb (high-pass at 200Hz to prevent muddiness, low-pass at 8kHz for a darker tone). Add subtle chorus or phaser to the reverb tail for stereo movement. Even add a touch of distortion to the reverb — this adds harmonics that make the reverberated sound sit better in a dense mix. Modulate the reverb decay time with slow LFOs for organic, evolving textures.

Plugin Recommendations for Dub Techno Delay Reverb
You don’t need expensive gear to make authentic dub techno. Here are my top picks across different budgets:
Free: Valhalla Supermassive
This is genuinely one of the best free plugins ever made. Valhalla Supermassive combines delay and reverb in a single interface, with feedback controls that let you create everything from subtle echoes to infinite, evolving soundscapes. The “Gemini” and “Large Magellanic Cloud” modes are practically designed for dub techno. It’s free. There’s no excuse not to have it.
Mid-Range: Valhalla Delay + FabFilter Pro-R
Valhalla Delay ($50) gives you tape-style delays with built-in filtering, diffusion, and modulation — all essential for dub techno. FabFilter Pro-R is one of the most musical reverbs available, with an intuitive EQ curve for shaping the reverb tail. Together, they cover every dub techno scenario you’ll encounter.
Premium: Eventide Blackhole
Designed for creating massive, otherworldly spaces. Blackhole’s “Gravity” control lets you reverse the reverb envelope, and its modulation section creates textures that no other plugin can match. It’s expensive, but if you’re serious about dub techno and ambient production, it’s worth every penny.
DAW Native: Ableton Live
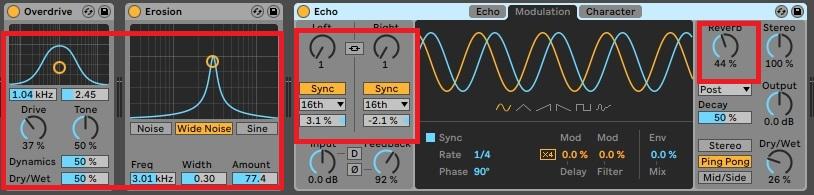
If you’re in Ableton, you already have excellent tools. Echo (delay with built-in reverb, filtering, and modulation), Filter Delay (three independent delay lines with individual filters), and Convolution Reverb (in Suite) can produce world-class dub techno with zero additional purchases. Use Redux for bit-reduction noise and Vinyl Distortion for crackle textures.
Chord Processing: Turning Two Notes Into a Universe
The chord stab is the emotional core of dub techno. Here’s how to process it from start to finish:
- Sound selection: Start with a simple pad or organ sound. Minor voicings only — major chords sound too happy for this genre. Two-note intervals (minor 3rds, perfect 5ths) work better than full triads.
- Overdrive: Add subtle overdrive or soft clipping before effects. This adds harmonic content for the delays and reverbs to grab onto.
- Dual echo setup: Send to two separate delay units. Detune them ±3% from each other. One at 1/8 dotted, one at 1/4. Pan them slightly left and right.
- Reverb wash: Send both delay returns to a shared hall reverb at 40-60% wet.
- Sidechain to kick: Compress the entire wet chain sidechained to your kick drum. This creates rhythmic pumping and prevents the lows from clashing.
Practical Session Settings
Here’s a quick reference for your DAW session:
- Tempo: 120-145 BPM (130 is the sweet spot for classic dub techno)
- Swing: 0% — dub techno is straight, rigid timing
- Key: Minor keys only (Dm, Am, Em are classics)
- Sidechain ratio: 4:1, fast attack (1ms), medium release (150ms)
- Bandpass filter: Center at 450Hz, resonance 30%, LFO rate 0.1-0.3Hz
- Bit reduction (for texture): Redux or similar at 6-bit for noise layer
- Vinyl crackle: 0.14 amount in Vinyl Distortion or equivalent
Common Mistakes to Avoid
After working with audio for nearly three decades, I’ve seen these errors repeatedly:
- Too many elements: If you have more than 4-5 sound sources, you have too many. Strip it back.
- Dry effects: Your wet/dry ratios should be aggressive. On send channels, go 100% wet. Don’t be timid.
- Ignoring the filter: Unfiltered delays and reverbs create mud. Always filter your effect returns.
- Wrong effect order: Reverb before delay sounds wrong for dub techno. Always: saturation → delay → reverb.
- Over-quantizing: Let some elements drift slightly off-grid. Dub techno has a loose, organic feel despite its electronic nature.
The beauty of dub techno lies in its paradox: extreme minimalism in composition, extreme maximalism in processing. You’re not writing complex music — you’re building a complex system that generates music from simple inputs. Master the delay and reverb chain, and you’ll find that two chords and a kick drum are all you ever needed.
Need help dialing in your dub techno sound or professional mixing and mastering for your next release?
Get weekly AI, music, and tech trends delivered to your inbox.


