
Grammarly Multilingual Launch: AI Writing Now Supports 5 New Languages Including Spanish and French
September 9, 2025
Samsung Galaxy S26 Early Rumors: Snapdragon 8 Elite 2, One UI 8, and Everything We Know So Far
September 9, 2025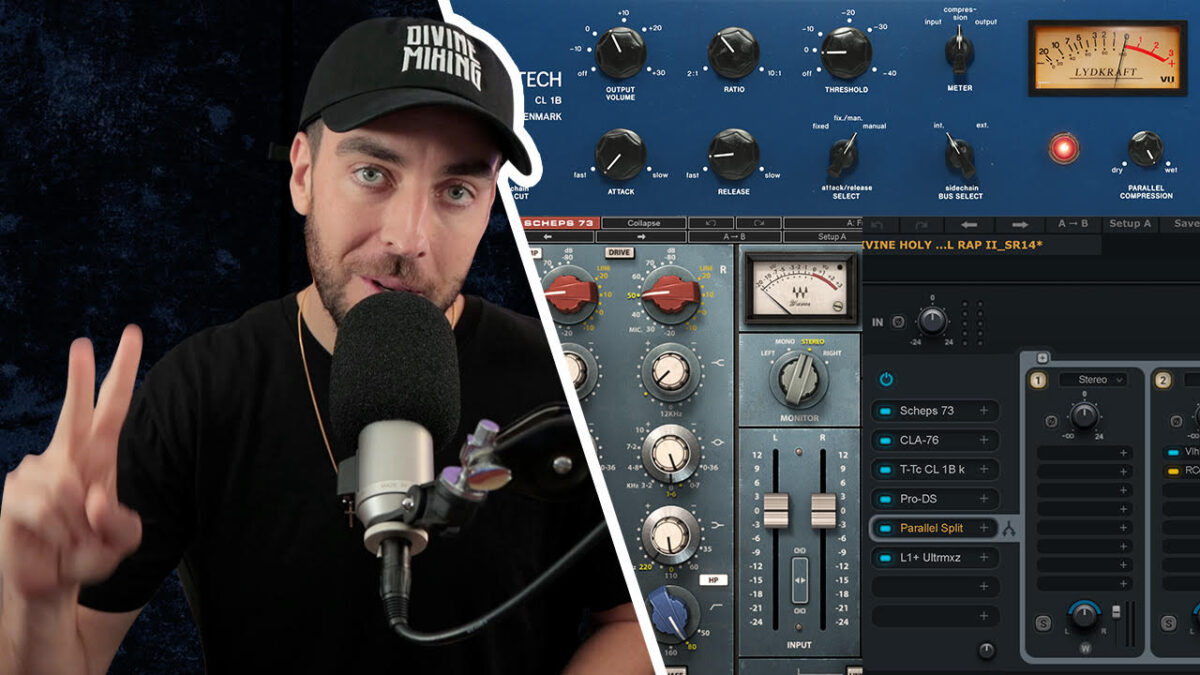
I swapped two plugins in a vocal chain last month — moved the de-esser before the compressor instead of after — and the entire vocal went from polished to painful in one click. That single reorder destroyed three hours of work. Hip-hop vocal mixing lives and dies by chain order, and after 28 years of engineering sessions across every genre, I can tell you: the difference between a bedroom mix and a chart-ready vocal is rarely the plugins you own. It’s the sequence you put them in.
This guide walks you through the complete hip-hop vocal mixing chain — from the moment you hit record to the final bus limiter — with exact settings, plugin recommendations, and the reasoning behind every decision. Whether you’re mixing melodic hooks or aggressive bars, these ten steps will get your vocals sitting right.
Why Plugin Order Matters in Hip-Hop Vocal Mixing
Every plugin in your chain reacts to what comes before it. Put a compressor before your subtractive EQ, and you’re compressing frequencies you plan to cut — wasting headroom and introducing artifacts. Put saturation before de-essing, and you’re generating new harmonics in the sibilance range that the de-esser then has to fight.
The signal flow used by engineers behind Drake, Kendrick Lamar, and Travis Scott follows a consistent logic: clean first, control second, color third, space last. The hardware-inspired chain — Neve 1073 preamp into an optical compressor (like the Tube-Tech CL 1B or LA-2A), then into an FET compressor — has been the backbone of hip-hop vocals for decades. We’re recreating that philosophy in the box.
Step 1: Recording — Getting the Best Raw Vocal
No amount of mixing fixes a bad recording. For hip-hop vocals, the Sony C-800G remains the industry standard — it’s been on more platinum hip-hop records than any other mic. But a Neumann U87 or even an Audio-Technica AT4050 will get you there if your gain staging is right.
Record 3-4 takes per section. Hip-hop vocals live on energy and timing, and comping the best phrases from multiple takes gives you a performance that no single take could deliver. Keep your input level peaking around -12dBFS to -6dBFS — this leaves headroom for processing without clipping your converter.
The recording chain matters too. If you have hardware, the classic path is: Mic → Neve 1073 preamp → light compression via LA-2A or CL 1B (2-3dB gain reduction max). In the box, you can skip the tracking compression and handle everything in the mix.
Step 2: Tuning and Editing
Before any processing, clean up the raw vocal. Remove breaths between phrases (or reduce them by 6-10dB rather than deleting entirely for a natural feel). Strip out mouth clicks, plosives, and background noise.
For pitch correction, hip-hop is one genre where aggressive settings are not just acceptable — they’re often the aesthetic. Auto-Tune with a fast Retune Speed (0-10ms) gives that hard-tuned modern sound. For more transparent correction, Melodyne lets you work note by note. Soundtoys’ MetaTune is another solid option with excellent formant handling. Set the Negative Speed and Note Stabilizer parameters tight for that polished modern vocal sound.
” alt=”hip-hop vocal mixing EQ plugin interface showing frequency analysis”/>
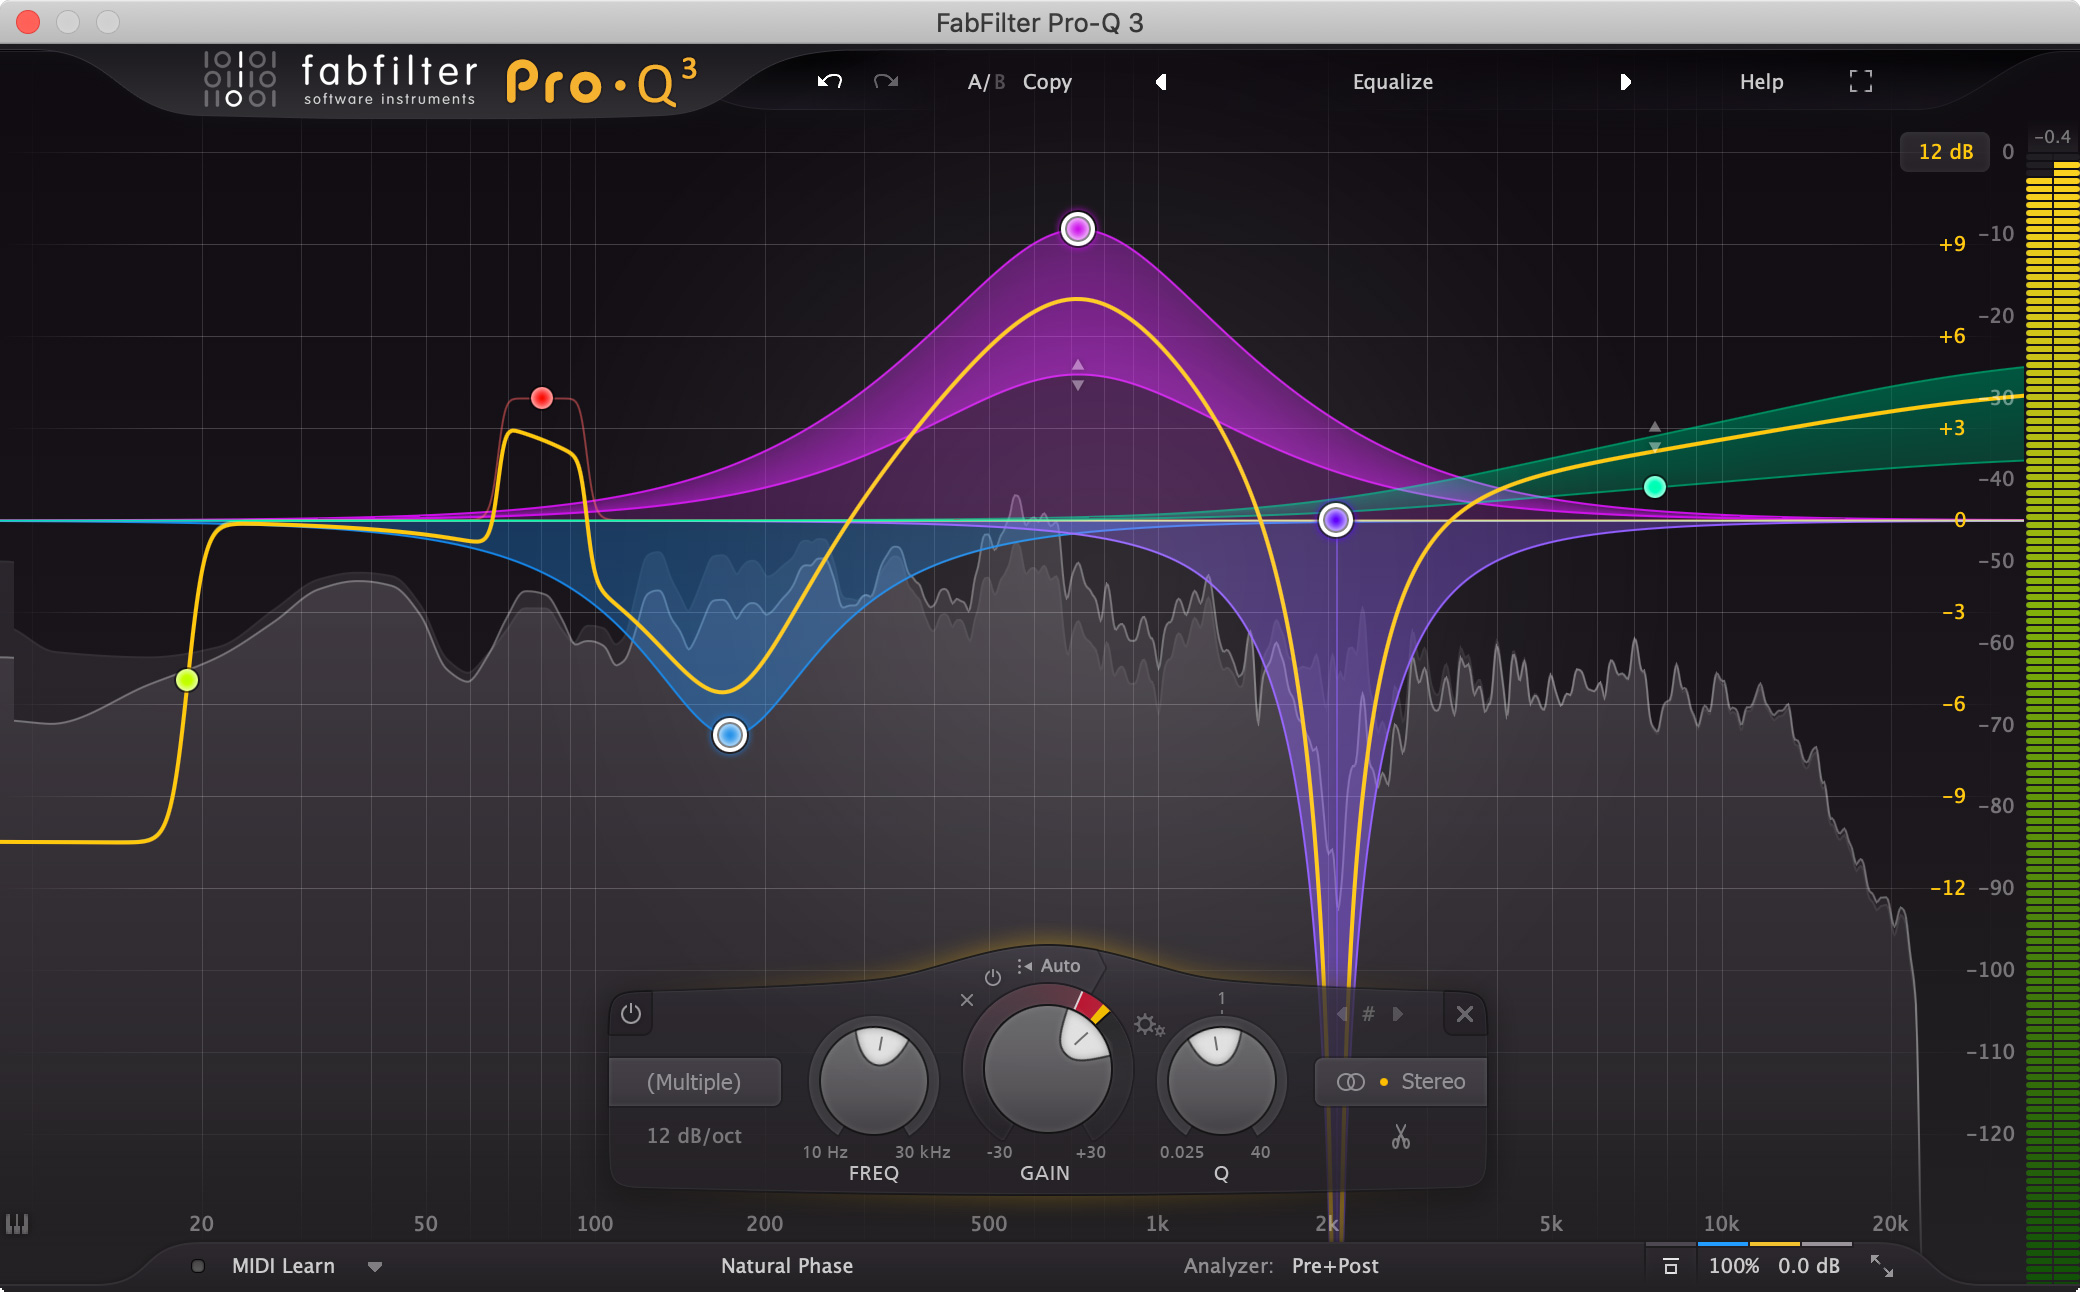
Step 3: Subtractive EQ — Cleaning the Foundation
This is where most amateur mixes go wrong. Before you boost anything, cut what doesn’t belong.
- High-pass filter at 80-120Hz: Hip-hop beats live in the sub-bass. Your 808s and kick drums own that territory. A vocal competing down there just creates mud. Roll off everything below 80Hz for male vocals, 100-120Hz for female vocals.
- Cut 2-4dB at 200-400Hz: This is the “boxy” zone. Almost every vocal recording accumulates muddiness here from room reflections and proximity effect.
- Notch around 300Hz for boxiness, ~1kHz for nasal honkiness — use narrow Q values (4-8) for surgical cuts.
FabFilter Pro-Q 3 is the gold standard here. Its dynamic EQ mode lets you set cuts that only engage when problem frequencies spike — meaning you’re not removing character from the vocal, just taming the worst moments.
Step 4: Compression — Controlling Dynamics
Hip-hop vocals demand aggressive compression. As Sweetwater’s mixing engineers note, 15dB of gain reduction is not uncommon on rap vocals — especially for aggressive delivery styles. The vocal needs to sit on top of dense, compressed beats without ducking behind the snare or getting buried by the 808.
The approach depends on delivery style:
- Melodic/laid-back delivery (Drake, 21 Savage): 4:1 ratio, attack 5-15ms, release 50-100ms. You want to control dynamics without killing the groove.
- Aggressive flows (Kendrick, fast bars): 6:1 ratio with faster attack (1-5ms). Clamp down on transients to keep every syllable at a consistent level.
Serial compression is the professional approach: use two compressors in series, each doing moderate work rather than one doing all the heavy lifting.
- First: FET compressor (Waves CLA-76) — Fast attack, punchy character. This catches peaks and transients. Set for 4-6dB of gain reduction.
- Second: Optical compressor (CLA-2A or Softube Tube-Tech CL 1B) — Slow, smooth, program-dependent release. This levels out the overall dynamic range gently. Another 3-5dB of gain reduction.
For a quick-and-dirty approach, Waves RVox handles vocal leveling remarkably well with minimal artifacts — one knob does most of the work.
Step 5: Additive EQ and Presence
Now that the dynamics are controlled, you can shape the tone. Compression changes the frequency balance of a vocal — transients get tamed, sustained portions get louder — so this second EQ pass addresses what the compressor revealed.
- Boost ~500Hz (1-2dB, wide Q): Adds vowel clarity and body. This is where the warmth of a male rap vocal lives.
- Boost ~3.5kHz (2-3dB): The presence zone. This is what makes a vocal cut through the beat without turning up the fader. If the vocal feels buried, this is usually the fix.
- Air shelf at 10-12kHz (1-2dB): Adds openness and “air” — but be careful, as this can also amplify sibilance.
Hip-hop also emphasizes warmth in the 100-200Hz range more than other genres. If your high-pass filter was aggressive, consider a gentle shelf boost here to restore some chest resonance.
Step 6: De-Essing and Resonance Control
De-essing comes after compression deliberately — compression raises the level of sibilance, so you need to catch it after it’s been amplified. FabFilter Pro-DS handles this with surgical precision. Set the frequency range around 5-8kHz, use a wide band, and aim for subtle reduction — you want to tame the “s” and “t” sounds without making the vocalist sound like they have a lisp.
For resonance control, Oeksound Soothe 2 is a game-changer. It dynamically suppresses resonant frequencies across the 350Hz-4kHz problem zone. Use it in soft mode with subtle settings — this is about transparency, not obvious processing. Soothe 2 catches the harsh resonances that a static EQ can’t address because they shift with every syllable.
” alt=”vocal compression plugin for hip-hop vocal mixing chain”/>
Step 7: Saturation — Adding Warmth and Edge
Tube saturation fills out a vocal in ways that EQ boosts can’t replicate. It adds harmonics that make the vocal feel bigger and more present — especially critical in hip-hop where vocals compete with heavily processed beats.
Softube Tube-Tech CL 1B in its saturation-heavy zone adds warm analog character. Alternatively, Soundtoys Decapitator or the free Analog Obsession CHANNEV can get you there. The key is subtlety — you want the vocal to feel warmer and more textured, not distorted. Saturation also introduces a natural presence filter that emphasizes high frequencies, helping the vocal cut through without harsh EQ boosts.
Step 8: Parallel Processing — The Secret Weapon
This is what separates professional hip-hop mixes from the rest. Create a parallel send from your vocal and apply aggressive high-frequency processing to it:
- Use a linear phase EQ to isolate the highest frequencies (8kHz and above).
- Apply upward compression — compress heavily (10:1 ratio, low threshold) to squeeze out every detail in that frequency range.
- Blend this parallel channel subtly underneath the main vocal — it should add shimmer and detail without being obviously audible as a separate signal.
This technique gives modern rap vocals that crispy, hyper-detailed top end without making the main vocal chain harsh. You’re adding perceived brightness and presence through parallel processing rather than EQ boosting.
Step 9: Spatial Effects — Reverb and Delay
Hip-hop vocals should be dry and upfront — this is non-negotiable for most subgenres. The vocal needs to feel like the artist is right in front of you, not singing in a cathedral.
Prefer delay over reverb for maintaining vocal presence. A 1/16th note delay mixed in at low volume creates a sense of space without pushing the vocal back. For the delay return, high-pass at 300Hz and low-pass at 5kHz to keep it tucked behind the main vocal.
When you do use reverb, keep it short and subtle: plate reverb with a 0.8-1.5 second decay, mixed at 10-20% wet. Valhalla Vintage Verb on a send bus handles this beautifully. Always use reverb on a send — never as an insert on the vocal channel.
Step 10: Bus Processing and Final Leveling
Route all your vocal tracks — lead, doubles, ad-libs — to a collective vocal bus. This is where you glue everything together:
- Subtle bus EQ: A gentle high shelf boost (0.5-1dB at 10kHz) across all vocals creates cohesion.
- Bus compression: Light compression (2:1, slow attack, auto release) with 1-2dB of gain reduction glues the vocals together.
- Final limiting: Waves L1+ Ultramaximizer as the last plugin on the vocal bus. This catches any remaining peaks and ensures the vocal sits at a consistent level against the instrumental.
Start with the bus fader all the way down. Play the beat, then gradually bring the vocal bus up until the vocals sit naturally on top. This “fader up” approach gives you a more musical balance than trying to match levels with the fader already at unity.
All-in-One Alternatives: When Speed Matters
Not every session has the budget for a ten-plugin chain. iZotope Nectar 4 combines AI-assisted compression, EQ, pitch correction, and harmony generation in one interface. Its Vocal Assistant analyzes your recording and generates a starting point that’s often surprisingly close to finished.
Mantra is another solid option — pitch correction, EQ, compression, de-essing, gating, saturation, and harmonies in a single plugin. And Process.Audio Comp.Two has emerged as one of 2025’s top vocal compressors, with a workflow designed specifically for vocal processing.
These all-in-one solutions are excellent for demos, quick sessions, or when you’re producing and engineering simultaneously. For final mixes headed to distribution, I still prefer the individual plugin chain for the control it provides at every stage.
The Complete Chain at a Glance
Here’s the full signal flow in order:
- Tuning (Auto-Tune / Melodyne / MetaTune)
- Subtractive EQ (HPF 80-120Hz, cut 200-400Hz)
- FET Compression (CLA-76: 4:1-6:1, fast attack)
- Optical Compression (CLA-2A / Tube-Tech CL 1B: gentle leveling)
- Additive EQ (boost 500Hz, 3.5kHz presence)
- De-Essing (FabFilter Pro-DS)
- Resonance Control (Soothe 2, soft mode)
- Saturation (tube saturation for warmth)
- Parallel HF Processing (linear phase EQ + upward compression)
- Spatial Effects on Sends (1/16 delay, plate reverb)
- Bus Processing (subtle EQ + L1+ limiter)
Every step in this chain builds on the one before it. Skip a step and the ones after it won’t work as intended. Reorder them and you’ll introduce problems that no amount of tweaking will fix. Trust the sequence, adjust the settings to taste, and your hip-hop vocals will sit exactly where they need to — front and center, punching through the beat.
Need professional mixing, mastering, or help dialing in your vocal chain? Sean Kim brings 28+ years of audio engineering experience to every session.
Get weekly AI, music, and tech trends delivered to your inbox.


